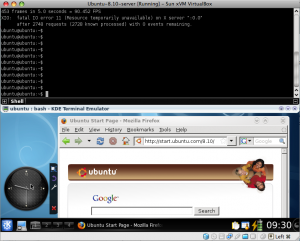
Today I decided to spend a little of my time on configuring an Ubuntu VBox on my MacbookPro. I was bugged by a “your system is not supported by us” error message while connecting to a remote service, which in turn stated Linux was actually supported. (Un)Fair enough, I love Linux much more than Macs too. Even if having a triple-boot mac(hine) is already planned, I had no time to spend giving BootCamp the first try, so I decided for a quicker way: install VirtualBox, grab an already installed&configured Ubuntu VBox an work with it. It’s a really easy and straightforward job:
-
Install VirtualBox – if your Mac is Intel based, there’s a handy dmg installer you can download from the VirtualBox homesite
-
Download a preconfigured VBox – installing a Linux virtual machine from scratch, i.e. from the distribution ISOs, is not really rocket science, but we want to go quick, though not dirt this time. Fortunately, the VirtualBox images project made available a number of ready-to-use *nix images, like Ubuntu, RedHat, OpenSolaris or even ReactOS! I picked up a Ubuntu Server Intrepid Ibex (username/password: ubuntu/reverse). You’ll need some 7zip software to extract the VBox
-
Configure the VBox – this step requires you’ve already extracted the VBox from the 7zip package. I used 7zX, but there are a bunch on the Internet. Now, start the VirtualBox software and add the VBox disk with File-> Virtual Media Manager -> Add, selecting the file in the VDI folder of the exploded package. This will be your virtual Hard Disk, with a maximum capacity of 20GB. Then you can follow the Machine -> New wizard, selecting Ubuntu Linux and the virtual drive just configured to make your setup almost complete. The only thing I had to modify from the default options was, in the General tab of the Settings of the newly created VBox, to enable the PAE feature, otherwise your VBox won’t start.
-
Launch your VBox and install stuff – we’re almost done. I had a very little issue with the Network, which was correctly configured from the Settings pane but was not working: the network interface was down. From dmesg I also noted that the iface name was different from what I was supposing. This made the trick:
ubuntu@ubuntu: ~$ sudo ifconfig eth1 up
ubuntu@ubuntu: ~$ sudo dhclient eth1
Then I noted that no Desktop Environment was already installed, but we know how to go (I love Deb* distros, as you may know :) ):
ubuntu@ubuntu: ~$ sudo apt-get install kde yaquake firefox
After about 1 hour (my Internet connection sucks, I know it) all was configured and usable. This is the result:

I must say, it runs quite well. Not a speed champion, but I had many other stuff working besides the virtual machine, like JBoss, Eclipse and Firefox instances.
Well, that’s it. Take care!
Twitter Facebook Hacker News